Pallet Storage Solutions

How to Plan a Warehouse Layout from Scratch: Step-by-Step Design Guide | Pallet Storage Solutions
Warehouse Design & Layout Series · 8-Step Guide

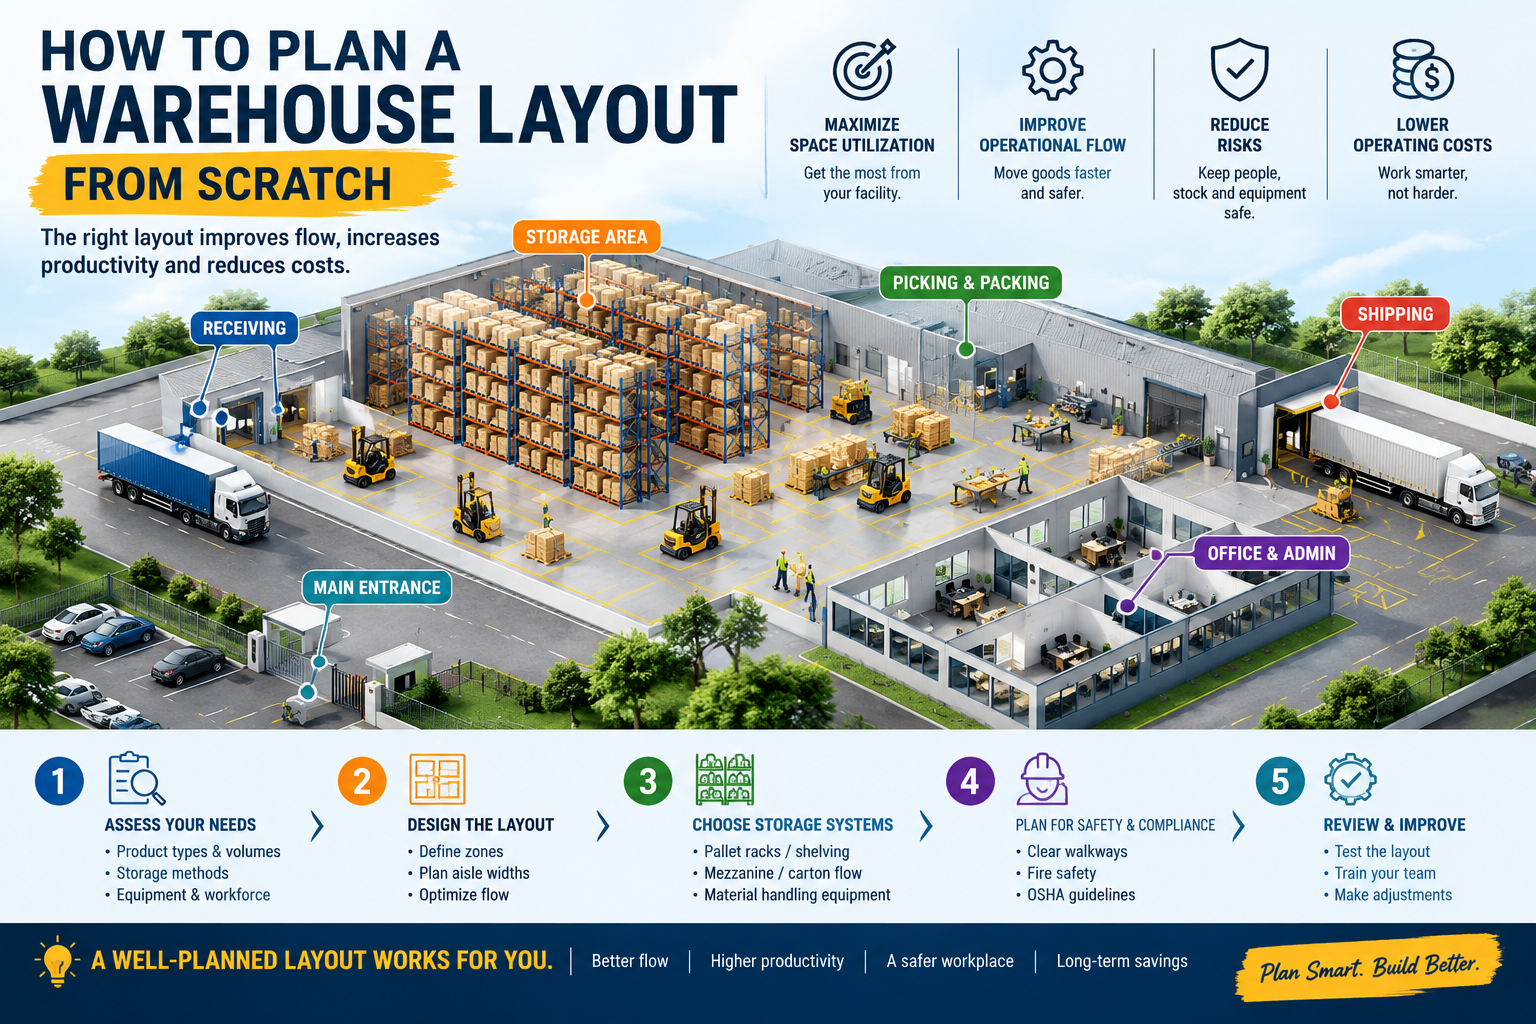
How to Plan a
Warehouse Layout
from Scratch

The most expensive warehouse mistake isn't buying the wrong racking system — it's buying the right racking system in the wrong layout. This guide walks through every stage of warehouse layout planning, from gathering your initial data to finalizing a system built for your next five years of growth.
📋 What This Guide Covers
01
Gather Building DataDimensions, columns, docks, obstructions
02
Inventory ProfileSKU count, peak pallets, rotation method
03
Define Functional ZonesReceiving, storage, picking, shipping
04
Choose Flow PatternU-shape, I-shape, L-shape, or Modular
05
Select Racking SystemMatch to your inventory and equipment
06
Calculate Space RequirementsNet area, positions, cubic utilization
07
Set Aisle WidthsEquipment-spec driven, not guessed
08
Build Your Slotting StrategyABC velocity before product moves in
1
Building Data
2
Inventory Profile
3
Functional Zones
4
Flow Pattern
5
Racking System
6
Space Calc
7
Aisle Widths
8
Slotting

An efficient warehouse layout combines the right pallet racking system, properly planned aisles, organized storage zones, and smooth material flow.

🏗
The right rack in the wrong layout performs worse than a mediocre rack in the right one.
Layout decisions are baked into the floor. Unlike equipment, they're not easy to upgrade. Getting the sequence right — data before design, design before ordering — is the framework.
80%
Target warehouse cubic utilization — most currently operate at 20–40%
Overview

Warehouse Layout Planning:
Why Process Matters

Warehouse layout planning is one of those decisions that looks simple on paper and gets complicated fast in practice. How wide should the aisles be? Where do receiving and shipping go? How many pallet positions do you actually need? What happens when the business grows by 40% in two years?


These questions have specific, defensible answers — but arriving at them requires a clear process. This guide walks through every stage, from gathering your initial building data to finalizing a racking system that fits your operation, your building, and your five-year growth trajectory. For professional help, see our warehouse design & layout services.


Whether you're fitting out a new facility, reconfiguring an existing one, or just trying to understand whether your current layout is leaving efficiency on the table — this is the framework that warehouse designers use.

Planning a new warehouse layout or reconfiguring an existing facility? Pallet Storage Solutions offers free professional warehouse layout consultations — including floor plan design, racking system selection, aisle width modeling, and pallet position analysis.
Get a Free Layout Plan →
1
Step 01 of 08

Gather Your Building Data
Before Touching a Floor Plan

Every warehouse layout starts with accurate physical data about the building. Designing from memory or outdated drawings is one of the most common — and most costly — planning mistakes. Walk the floor with a tape measure before anything else.

📐
Building Dimensions & Floor Plan
Accurate interior dimensions — length, width, and clear ceiling height in each zone
Structural column locations and dimensions — columns determine where rack rows can and cannot go
Floor load capacity — the slab's rated load-bearing capacity in pounds per square foot
Floor flatness (F-number) — critical for narrow aisle or mobile racking systems
Existing floor penetrations, drains, or utility trenches affecting anchor point placement
🚢
Dock & Door Configuration
Number, size, and location of dock doors (inbound vs. outbound)
Dock leveler type and projection into the building
Grade-level entry doors and clear opening dimensions
Trailer staging depth outside — affects inbound and outbound flow planning
🔧
Overhead Obstructions
Fire sprinkler line locations and sprinkler head heights (NFPA 13: 18" clearance above stored goods)
HVAC ductwork, lighting fixtures, and hanging electrical conduit
Roof truss configuration — determines where tall uprights can be anchored
⚠ Critical Warning
Never Trust the Landlord's Brochure Dimensions
Clear ceiling height in particular is frequently overstated in marketing materials. Walk the actual floor with a tape measure and verify every dimension you will base your rack design on. A rack system designed for 28 feet of clear ceiling installed in a building that actually has 26 feet of clear ceiling is a costly error — and one that happens more than you'd think.
Verify clear ceiling height by measuring floor to the lowest overhead obstruction — not to the roof deck, not from the landlord's drawing.
Use a Site Survey Form
Document every measurement with a dated form, photo record, and the name of the person who took each measurement. This becomes your source of truth for the entire layout design process.
2
Step 02 of 08

Define Your Inventory Profile
& Operational Requirements

Your building tells you what's possible. Your inventory tells you what's necessary. Answer each of these questions before choosing a racking system or drawing an aisle — the answers determine everything.

Volume · Question 01
What is your peak pallet count?
Not your average — your peak at the busiest time of year. That's what your system must be sized for. Designing to average means you'll run out of space every busy season.
→ Size your system to peak + 15–20% buffer, not to today's average inventory.
Growth · Question 02
How many pallets will you need in 3–5 years?
Design to your growth projection, not your current state. Reconfiguring a rack system that's already installed is significantly more expensive than designing for growth upfront.
→ Project forward 3–5 years. Build for where you're going, not where you are.
SKU Profile · Question 03
What is your SKU count?
High SKU counts require individual pallet accessibility — which limits your density options. A 5-SKU frozen food operation and a 500-SKU general warehouse need completely different systems.
→ High SKU = selective or double-deep. Low SKU = drive-in or push-back viable.
Weight & Size · Question 04
What is your average and max load weight per pallet?
Drives beam and upright capacity specification. Also determines whether high-bay systems need structural engineering review for combined frame loads at maximum capacity.
→ Spec beam pairs and uprights for your heaviest expected pallet — not average.
Dimensions · Question 05
What pallet dimensions do you use?
Standard 48×40 GMA or Euro pallets, custom sizes, or mixed formats? Pallet dimensions directly determine bay width, depth, and beam height specification across every rack row.
→ Measure your actual tallest loaded pallet. This controls beam level spacing throughout.
Rotation · Question 06
Do you require FIFO or LIFO rotation?
FIFO requirements eliminate drive-in racking and push-back racking as density options — both are LIFO-only systems. This single requirement can significantly change your available system choices.
→ FIFO → pallet flow or drive-thru only. LIFO → drive-in and push-back viable.
Velocity · Question 07
Which products move daily? Weekly? Rarely?
ABC velocity profile drives your slotting strategy. Knowing your A, B, and C movers before racks go in allows you to slot correctly from day one rather than reorganizing later.
→ A items (top 20% by picks) → ground-level, nearest shipping dock.
Throughput · Question 08
How many pallets move per day at peak?
Daily throughput determines dock door count, equipment quantity, and the sizing of your receiving and shipping zones — not just your storage area. Undersized docks create bottlenecks the storage area can't fix.
→ Dock capacity must match peak daily throughput — not average throughput.
3
Step 03 of 08

Define Your Functional Zones:
Size & Position Each Area

A warehouse is not a single undifferentiated storage room. It's a collection of functional zones that work together — and the relationship between those zones determines how efficiently your operation flows.

Zone
Floor Allocation & Key Requirement
Typical %
Receiving
Inbound unloading, inspection & staging
Dock door access, staging lanes, inbound area separate from storage
8–12%
of floor
Put-Away / Staging
Temporary holding before slotting
Close proximity to receiving and storage — minimize travel distance
5–8%
of floor
Primary Storage ★
Pallet racking — main inventory
Racking system selection, aisle widths, vertical space utilization
40–55%
largest zone
Reserve / Overflow
Bulk or seasonal excess stock
High-density format (drive-in, push-back) to minimize premium floor space
10–15%
of floor
Pick / Forward
Active order picking at floor level
Ground-level access, ergonomic pick heights, labeling system
10–15%
of floor
Packing & Shipping
Order packing, labeling, outbound staging
Close to shipping docks, sufficient bench space per order volume
8–12%
of floor
Pedestrian / Safety
Egress, walkways, safety zones
28" OSHA emergency egress min; 36"+ preferred; clearly marked and kept clear
5–8%
of floor
🔑
Design principle: Product flow should move in one direction — from receiving, through storage, to shipping — with as little backtracking, crossing, or doubling-back as possible. Any time product travels backward in your facility, it's costing you labor.
4
Step 04 of 08

Choose Your Layout
Flow Pattern

Once your zones are defined, you need to determine how they connect — the overall flow pattern of your facility. There are four primary warehouse layout types used in US operations.

Best for High Volume
I-Shape / Through Flow
RECEIVE
↓
STORAGE
↓
SHIP
Receive one end → Ship other end. High volume, cross-docking, distribution centers. Straight-line flow.
Moderate
Storage Eff.
Very High
Operational Eff.
Corner / Irregular Buildings
L-Shape Flow
↓ IN
OUT →
Receive one side → Ship adjacent side. Works around site constraints or corner buildings.
Moderate
Storage Eff.
Moderate
Operational Eff.
Multi-SKU Fulfillment
Modular / Zone
Dedicated zones for each function. E-commerce, multi-SKU fulfillment. Zones optimized independently.
Mod–High
Storage Eff.
High
Operational Eff.
⭐
The U-Shape Advantage for New Facilities
The U-shape layout is the default recommendation for most US warehouses because it concentrates receiving and shipping docks on the same wall — reducing building perimeter, simplifying dock staffing, and shortening the travel distance between inbound and outbound operations. For new facility designs, specify dock doors on a single long wall rather than splitting receiving and shipping across two walls. This single decision saves tens of thousands of dollars in building perimeter cost and creates a cleaner operational flow from day one.
5
Step 05 of 08

Select the Right Racking System
for Your Inventory Profile

Your inventory profile from Step 2 and your zone layout from Step 3 together determine which racking system is appropriate. Use this decision guide to narrow your options.

If Your Operation Looks Like This…
Use This Racking System
Scenario A
High SKU count, mixed products, frequent picking required
→
Full access to every pallet — no product blocking
Scenario B
Limited SKUs, high volume, LIFO rotation acceptable
→
Maximum density, lowest cost per pallet position
Scenario C
Multiple SKUs, medium depth, LIFO rotation
→
Push-Back Rack
2–5 deep density without entering the rack
Scenario D
Perishables or FIFO required at high density
→
Pallet Flow (Gravity) Rack
FIFO at depth with gravity-fed roller system
Scenario E
Medium density, reach truck already in fleet
→
Double Deep Rack
Higher density than selective with existing equipment
Scenario F
Maximum density required — cold storage or pharma
→
Mobile Pallet Rack
Movable aisles eliminate fixed aisle space entirely
Scenario G
Long goods — lumber, pipe, sheet metal, extrusions
→
Cantilever Rack
Open-face design handles non-palletized long items
Scenario H
Small parts, carton picking, multi-level picking
→
Carton Flow or Shelving
Right-sized for small goods — selective is oversized
💡
Most warehouses use a combination of systems. Selective racking as the primary storage format with drive-in or push-back in reserve zones, and carton flow or shelving in the pick area. A hybrid layout almost always outperforms a single-system approach for mixed-operation warehouses. Compare options in our guide to selective vs. drive-in vs. push-back racking.
6
Step 06 of 08

Calculate Your Space Requirements:
The Cascade Method

Work through these calculations in sequence — each number feeds the next. Together they tell you whether your building can accommodate your storage needs and where the gaps are.

1
Gross Building Area
Interior Length × Interior Width
Starting point — everything else is subtracted from this
2
Unusable Area
Sum of columns + walls + restrooms + offices + mechanical rooms
Reduces your true planning area by 5–15% in most facilities
3
Net Usable Area
Gross Area minus Unusable Area
The actual floor space available for warehouse operations
4
Aisle Space
Net Area × Aisle % (45–55% wide aisle; 15–20% VNA)
How much floor goes to travel vs. storage
5
Net Storage Area
Net Usable Area minus Aisle Space
Floor footprint actually available for rack installation
6
Pallet Positions (Ground Level)
Net Storage Area ÷ (Bay Width × Bay Depth)
Starting point for total pallet position count
7
Pallet Positions (All Levels)
Ground-level positions × Number of beam levels
Total system capacity — the number that matters most
8
Cubic Utilization %
(Occupied Cubic Ft ÷ Total Available Cubic Ft) × 100
True measure of warehouse efficiency — target 80%
Target Operating Utilization
80–85%
A well-designed warehouse operates at 80–85% of its theoretical maximum pallet position count. This buffer is not wasted space — it's operational necessity. Without it, you can't receive new product while picking existing stock or accommodate seasonal volume spikes.
The Honest Answer at 95%+
Upgrade
If your calculations show 95%+ utilization needed to make your inventory fit, the answer is either a higher-density racking system or additional space — not a tighter layout that will perform poorly in practice. Tight layouts look great on paper. They're miserable to operate.
7
Step 07 of 08

Set Aisle Widths Based on
Your Material Handling Equipment

Aisle width is the variable that most directly affects both storage density and operational safety — and it must be determined by your equipment, not by preference or approximation. Confirm before finalizing upright anchor points.

The formula: Equipment manufacturer's minimum operating aisle + 6–12 inches safety clearance + column guard width (if installed) = Required Aisle Width
#
Equipment Type
Minimum Clear Aisle
Recommended Aisle
Aisle Type
01
Counterbalance Forklift
Standard 48-in pallet
12 ft
12–13 ft clear
Wide Aisle
02
Reach Truck
Narrow aisle configuration
9 ft
9–10 ft clear
Narrow Aisle
03
Double-Deep Reach Truck
Extended reach arm
10 ft
10–11 ft clear
Narrow Aisle
04
VNA Turret Truck
Wire or rail guided
5.5 ft
5.5–6.5 ft clear
VNA
05
Pedestrian Walkway
OSHA 1910.36(g)
28 in
36 in+ preferred
Pedestrian
⚠️
Confirm aisle widths before finalizing upright anchor point positions. Once anchor points are drilled, changing aisle widths means removing and repositioning the entire rack system. The cost of a professional layout consultation before purchasing racks is always lower than the cost of reconfiguring a fully installed system. Always verify pallet rack weight capacity against your planned loads as well.
8
Step 08 of 08

Build Your Slotting Strategy
Before Moving Product In

Most warehouses slot product reactively — fill from the front, put overflow wherever there's space. Slotting proactively before product goes into the racks is one of the highest-ROI decisions in warehouse setup.

📦 ABC Velocity Slotting — Rack Zone Map
C
C Items — Top Levels
Slowest movers · Highest access time acceptable
~50%
C
C Items — Upper Storage
Absorbs the extra travel and lift time
of SKUs
B
B Items — Mid Levels
Beam levels 2–3 · Moderate travel from dock
~30%
B
B Items — Secondary Pick
Reach truck accessible, medium frequency
of SKUs
A
A Items — Ground Level
Fastest access · Nearest shipping dock
~20%
A
A-Velocity Items
Top 20% by pick frequency. Ground-level positions closest to the packing and shipping area. Zero lifting equipment required, minimum travel distance. +15–25% pick speed improvement when A items are correctly slotted.
B
B-Velocity Items
Middle 30% by pick frequency. Store at beam levels 2–3, accessible by reach truck but not occupying prime floor-level positions near shipping.
C
C-Velocity Items
Bottom 50% by pick frequency. Move to the highest rack levels and remote storage positions. Slowest movers can absorb the additional access time without significantly impacting operational efficiency.
Weight logic: Apply weight-based vertical slotting in addition to velocity. Heavy items belong at lower levels regardless of pick frequency — reduces ergonomic risk and keeps high-weight loads close to the floor for structural efficiency.
Common Pitfalls

8 Warehouse Layout Planning
Mistakes That Derail New Operations

Even experienced warehouse managers fall into these traps. Recognizing them during the planning phase — rather than after installation — saves significant time, money, and frustration.

1
Mistake 01
Buying Racks Before Finalizing the Layout
Urgency or budget pressure to order early. Racks arrive before anchor points are confirmed.
Complete a floor plan with aisle widths confirmed before placing any rack order.
2
Mistake 02
Designing for Today's Inventory, Not Tomorrow's
Short-term thinking at planning stage. Facility outgrows layout in 18 months.
Project 3–5 year growth in SKU count, pallet count, and throughput before finalizing.
3
Mistake 03
Ignoring Dock Door Count and Placement
Dock access treated as a construction detail rather than an operational constraint.
Dock capacity must match peak daily throughput — not average throughput.
4
Mistake 04
Placing Fast Movers at the Back of the Warehouse
'Fill from the back' habit. A items buried behind C items — every pick takes longer.
Implement ABC velocity slotting before moving product in. A items nearest shipping.
5
Mistake 05
No Dedicated Pedestrian Zones in Active Areas
Assumes workers can share forklift aisles safely. OSHA enforcement says otherwise.
Designate and mark pedestrian corridors before operations begin; add barriers at crossings.
6
Mistake 06
Overlooking Column Locations in the Building
Working from a clean CAD file rather than a site survey. Columns block rack rows.
Walk the actual floor and mark every structural column — they determine rack row placement.
7
Mistake 07
Not Verifying Floor Load Capacity
Assumed all warehouse floors carry equal loads. High-bay systems can exceed slab capacity.
Confirm concrete slab load rating with a structural engineer before installing heavy systems.
8
Mistake 08
Leaving No Room for Layout Changes
Anchoring every system from day one. No flexibility for seasonal or operational adjustments.
Keep at least one or two rack rows unanchored in flexible zones for future adjustments.
Expert Input

When to Bring in a Professional
Warehouse Layout Designer

Some warehouse layouts can be planned competently by an experienced operations manager with grid paper and the right reference data. Others genuinely require professional design input. Here are the situations where a professional consultation is not optional.

📏
Facilities Over 30,000 Square Feet
Layout errors in large facilities have large-scale consequences — a wrong aisle width across 40 rack rows costs significantly more to correct than in a 5,000 sq ft space.
🏗
High-Bay Systems Exceeding 20 Feet
Seismic, structural, and fire protection engineering intersect at high bay heights. ANSI MH16.1 and local building codes require engineering review in most jurisdictions above this height.
❄️
Cold Storage Environments
Floor systems, rack finishes, equipment specification, and energy efficiency require integrated design that standard warehouse planning tools don't address.
🔄
Multi-System Layouts
Combining racking types, conveyors, mezzanines, or automation requires system integration that goes well beyond rack selection and aisle planning.
🌍
Facilities in Seismic Zones
IBC requirements mandate engineering review for rack installations in seismic design categories C and above — a professional consultation is not optional.
📈
Significant Growth Projections
When scalability must be engineered in from the start — not retrofitted later — professional design input at the planning stage pays for itself many times over.
Complimentary Service
Free Professional Warehouse Layout Consultation
Quality racking suppliers — including Pallet Storage Solutions — offer complimentary warehouse layout consultations as part of the quoting process. This is one of the most underutilized resources available to US warehouse operators.
What's Included — Free
→
Professional floor plan design built for your building
→
Racking system selection matched to your inventory profile
→
Aisle width modeling per your equipment type
→
Pallet position count and density analysis
→
Specification ready to order at no additional cost
Get Your Free Layout Plan →
FAQ

Frequently Asked
Questions

10 common warehouse layout planning questions — answered clearly for US warehouse operators at every stage of the planning process.

All Questions
Planning
Space & Zones
Systems
Timeline
Still Have Questions?
Our warehouse layout specialists can model your facility and give you a pallet position count, system recommendation, and floor plan — free of charge as part of our quoting process.
Get a Free Layout Plan →
Start by gathering your building dimensions, dock door locations, and structural column positions. Define your functional zones (receiving, storage, picking, shipping). Choose your racking system based on inventory profile and equipment. Calculate aisle widths from your forklift specifications. Model pallet positions and verify cubic space utilization. Then work with a racking specialist to finalize and refine the design before ordering equipment. Our free warehouse layout consultation covers this process end to end.
A well-designed warehouse layout includes: a receiving zone (inbound unloading and inspection), put-away staging, primary storage (pallet racking), reserve or overflow storage, a forward picking area for fast-moving SKUs, a packing and shipping zone, and dedicated pedestrian aisles. The relative size of each zone depends on your throughput volume and operational model.
The U-shape flow layout is the most widely used efficient design — goods enter at one side of a U, are stored in the middle, and exit on the other side, with a shared dock area reducing building perimeter cost. For high-volume distribution with cross-docking, an I-shape (straight-through flow) layout is often more efficient. The 'best' layout depends on your dock count, building shape, and operational flow.
In a wide-aisle warehouse with counterbalance forklifts, aisles typically consume 45–55% of usable floor space. Narrow aisle systems with reach trucks reduce this to 25–35%. Very Narrow Aisle (VNA) configurations bring it to 15–20%. Reducing aisle percentage is the primary lever for increasing storage density without changing the building footprint.
Warehouse slotting is the process of assigning specific storage locations to specific products based on pick frequency, weight, size, and other factors. Effective slotting places fast-moving items (A-velocity) at ground level near shipping, medium movers (B-velocity) at mid-rack levels, and slow movers (C-velocity) at upper rack levels — significantly reducing travel time and labor cost.
Estimate your peak inventory in pallets — not average. Add 15–20% buffer for flexibility and receiving overflow. That total is your target pallet position count. Then work backward: divide by the number of beam levels your rack system will use to determine the ground-level rack footprint required, and verify it fits within your net usable storage area.
Basic layouts for small facilities with straightforward operations can be planned internally with grid paper or free CAD tools. However, for facilities over 20,000 square feet, multi-SKU operations, high-bay systems, or any layout involving seismic requirements, fire suppression integration, or specialized equipment, a professional warehouse design consultant or racking specialist adds significant value and prevents expensive mistakes.
Common tools range from free options like AutoCAD LT and Floorplanner to specialized software such as SketchUp, DELMIA Apriso, and proprietary tools offered by racking suppliers. Many quality racking suppliers provide free layout design services using their own software as part of the quoting process — a practical option for most US warehouses before investing in standalone software.
Rack height is limited by your clear ceiling height (floor to lowest overhead obstruction), fire sprinkler clearance requirements (NFPA 13 requires 18 inches of clearance above stored goods), local building codes, and the engineering specification of your upright frames. Systems exceeding 20 feet typically require reach trucks; systems over 30 feet require VNA equipment or automated storage systems.
A full warehouse layout planning process — from initial design through racking installation — typically takes 4–12 weeks depending on facility size, system complexity, and equipment lead times. Simple selective rack installations in smaller facilities can be completed in 2–3 weeks. Complex high-bay or automated systems in large distribution centers can take 3–6 months or longer from design to fully operational.

Leave a Comment

Your email address will not be published. Required fields are marked *

Scroll to Top